There are many different methods used to create objects in the world of engineering. Part of the design process must include considerations of material and method of manufacturing. The way a drawing is dimensioned is directly related to the manufacturing process specified.
Entire courses are devoted to manufacturing. Our goal with this section is to introduce a popular and cost-effective process of sand casting and explain how to dimension an object created using process. A brief description of this process follows.
Sand casting involves the creation of a sand mold. This mold is produced by packing a sand mixture around a pattern in a flask. The flask is then carefully parted so the pattern can be removed. This leaves a cavity that matches the original pattern. The flask can then be reassembled and molten metal poured into it. When the process is complete, you are left with an exact duplicate of the original pattern. The second part of this process involves machining the cast object to finish it. In general, holes are not part of the original pattern, and some of the surfaces (usually where the part contacts another part in an assembly) may need machining to remove the rough sand-like finish left from the mold.
A part that is created with this sand casting process could also be produced by starting with solid stock and removing material with various machine tools to create the desired shape. This method would be much more costly as a lot of material would be wasted along with the machine bits and cutters required. The final product may be more aesthetically pleasing to the eye, but have no functional advantage as a result of the additional cost.
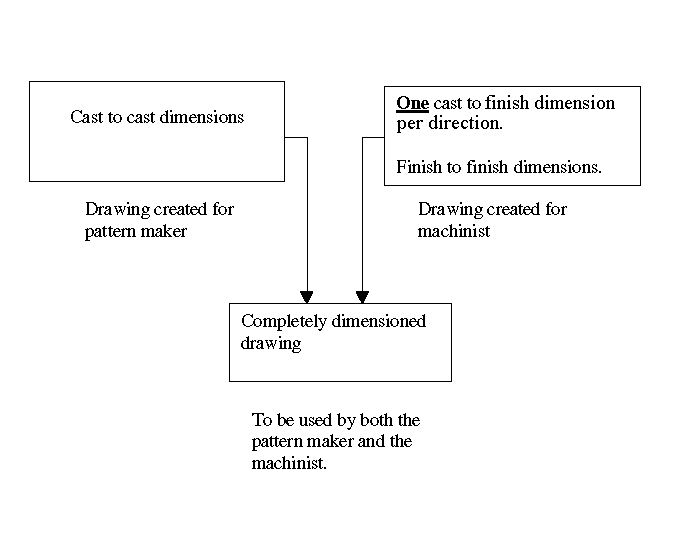
Complex objects that are to be cast may have separate drawings for the person responsible for making the pattern and for the person who will be finishing the part. The drawing for the pattern maker would only have dimensions that are "cast to cast" dimensions. These dimensions typically do not have to be measured as accurately as the dimensions that the machinist would need to locate and produce holes or to remove material to finish a surface. A second drawing might be provided for the machinist, giving only the dimensions necessary to complete the finished design features on the part. More commonly, however, all the dimensions required to produce the object will be contained on a single drawing. This drawing will have all the information the pattern maker needs to produce the pattern. If a surface on the part is shown as being finished, the pattern maker must realize this and provide extra material on the pattern. It will also contain all the dimensions required to accurately finish the part.

In dimensioning the drawing, it is critical that there only be one dimension that locates a finished feature from a cast feature in any direction. Once a finished feature (machined surface or centerline of a hole) is located, any other finished features in that same direction should be located from that feature. Remember that the cast features are not produced with the accuracy that the finished features require. It is most important the all the finished features be located with respect to each other. These finished features determine how the part is positioned with respect to other parts in an assembly.
To summarize, a single drawing that specifies a part to be cast using the method outlined above should not have more than one "cast to finish" dimension in any single direction. This does not mean one "cast to finish" dimension per view, since each orthographic view has two dimensions. There can be as many "cast to cast" dimensions as needed to specify the cast features on the object. There can be as many "finish to finish" dimensions as needed to locate the finished features on the object.